Controlling your garage doors with an ESP32 - Part 2
- September 21, 2018
- tuxotron

In this second post of this series, we’ll see how to connect a couple of magentic switches, one for each door, that will allow us to see if a door is closed or not.
I’m using this one in particular: https://www.adafruit.com/product/375.
This sensor has two wires, one goes to ground (GND) and the second one to an output GPIO pin. In my case I’m using pins 25 and 26 for the left and right door respectively.
Now our schematics will look like this:

I also updated the code with the parts to interact with these sensors. All the changes were made in the main/app_main.c file. Here are the relevant snippets:
static const char *LEFT_DOOR_STATUS_TOPIC = "garage/door/left/status";
static const char *RIGHT_DOOR_STATUS_TOPIC = "garage/door/right/status";
...
#define LEFT_DOOR_SENSOR_GPIO 25
#define RIGHT_DOOR_SENSOR_GPIO 26
We added four new constants, two to define the new topics were the sensor will be receiving/sending the traffic and another two to define the pin numbers where we are connecting the sensors.
In the initialization code:
gpio_set_direction(LEFT_DOOR_SENSOR_GPIO, GPIO_MODE_INPUT);
gpio_set_direction(RIGHT_DOOR_SENSOR_GPIO, GPIO_MODE_INPUT);
gpio_pullup_en(LEFT_DOOR_SENSOR_GPIO);
gpio_pullup_en(RIGHT_DOOR_SENSOR_GPIO);
Here we are settng the two GPIO as input mode, since in this case will be reading from them, and also we pull them up.
case MQTT_EVENT_CONNECTED:
    ...
    msg_id = esp_mqtt_client_subscribe(client, LEFT_DOOR_STATUS_TOPIC, 0);
    ESP_LOGI(TAG, "sent subscribe successful, msg_id=%d", msg_id);

    msg_id = esp_mqtt_client_subscribe(client, RIGHT_DOOR_STATUS_TOPIC, 0);
    ESP_LOGI(TAG, "sent subscribe successful, msg_id=%d", msg_id);
In this snippet, once we are connected to the MQTT server, we subscribe to the new topics. And the last thing I added was the code that handles the messages:
if (strcmp(topic, LEFT_DOOR_TOPIC) == 0) {
  ...
} else if (strcmp(topic, RIGHT_DOOR_TOPIC) == 0) {
  ...
} else if (strcmp(topic, LEFT_DOOR_STATUS_TOPIC) == 0) {
    if (strcmp(data, "get") == 0) {
        if (gpio_get_level(LEFT_DOOR_SENSOR_GPIO)) {
            esp_mqtt_client_publish(client, LEFT_DOOR_STATUS_TOPIC, "status:open", 0, 0, 0);
        } else {
            esp_mqtt_client_publish(client, LEFT_DOOR_STATUS_TOPIC, "status:closed", 0, 0, 0);
        }
    }
} else if (strcmp(topic, RIGHT_DOOR_STATUS_TOPIC) == 0) {
    if (strcmp(data, "get") == 0) {
        if (gpio_get_level(RIGHT_DOOR_SENSOR_GPIO)) {
            esp_mqtt_client_publish(client, RIGHT_DOOR_STATUS_TOPIC, "status:open", 0, 0, 0);
        } else {
            esp_mqtt_client_publish(client, RIGHT_DOOR_STATUS_TOPIC, "status:closed", 0, 0, 0);
        }
    }
}
Here as you see we are responding only when we receive the get payload or message. Then we read the sensor gpio_get_level(….), and if the result is true (not equal to 0), then we send back to the topic the message status:open or status:closed otherwise.
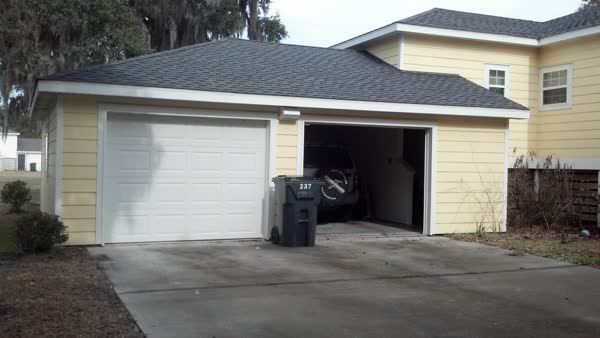
Here is a little video showing this functionality with just one sensor:
If you missed part one of this series, here you have Part 1
Controlling your garage doors with an ESP32 - Part 1
- September 19, 2018
- tuxotron
Four years ago, I got to wire up a Raspberry Pi to a 2 channel relay and a couple of sensors, and hook it up to my garage door openers. This allowed me to open/close any of the doors, as well as to see if the doors were open or closed. Here is blog post I wrote then explaining all I did: https://www.cyberhades.com/2014/02/04/controlando-las-puertas-del-garaje-con-un-raspberry-pi/ (Spanish). This setup suffered a couple evolutions, adding into the picture an MQTT broker (mosquitto), an Android app and even an application for my good old Pebble watch. Although I never published any of theses evolutions, here you can watch a video opening my garage door (as you can see is also a different house… military life…):
Although the setup worked pretty nicely, during this time I had to replace the SD Card at least twice, plus sometimes due to power outages, I had some issues with network connectivity, requiring a device restart. Because of that and the fact you don’t really need much power for driving a relay this way, I decided to go with an ESP32 micro controller, in particular with this development board. Also I would like to mention, the boot up time in the micro controller is way better, since there is not operating system.
The wiring is pretty simple. We need four wires, the power of the relay (VCC) will connect to the 5V output pin in our board, the ground (GND) to one of the GND pins in the board, and then we need to more wires for each channel, in my case I connected the left channel to GPIO 32 and the right one to GPIO 33. Here is the schema:

To program the micro controller, I used the ESP-IDF (Espressif IoT Development Framework).
The way we’ll communicate with our micro controller, will be through an MQTT broker, in this case I’m using Mosquitto, but it should work with any other broker. All the source code is also published on this Github repository, and lastly, I am using this esp-mqtt component, which you will have to install separately following their installation process.
Assuming you already have installed the ESP-IDF and the esp-mqtt component mentioned above, the first thing you need to do is to clone the repository:
git clone https://github.com/tuxotron/garage-esp32
Once you have done that, you need to configure your project by running:
make menuconfig
And you should see something like this:

The first thing you want to do here is to configure your Serial communication, device and speed (the development board I am using accepts up to 921600 baud).

The next you want to configure are the parameters for our project (Garage Door Opener option), in particular you need to provide an SSID and its password, and an MQTT broker, MQTT username and password (in this case, for testing purposes, I’m using mqtt://iot.eclipse.org, which doesn’t required authentication, so we can leave the the username and password blank).

Once you have done that if everything is working properly, then your ESP32 will be listening (subscribed) to two topics: /garage/door/left and /garage/door/right. When a message arrives to any of these channels, we’ll check the value of such message and if the value is PUSH, then we close the relay for .5 seconds, otherwise we discard the message and do nothing.
Let’s go through some of the important parts of the code.
static const char *LEFT_DOOR_TOPIC = "/garage/door/left";
static const char *RIGHT_DOOR_TOPIC = "/garage/door/right";

#define LEFT_DOOR_GPIO 32
#define RIGHT_DOOR_GPIO 33
These are some of the constants where we define the topic names and the GPIO ports our relay is connected.
During the initialization part, besides connecting to the WIFI, etc. We need to set the LEFT_DOOR_GPIO and RIGH_DOOR_GPIO as output and high.
void app_main()
{
    ...

    gpio_pad_select_gpio(LEFT_DOOR_GPIO);
    gpio_pad_select_gpio(RIGHT_DOOR_GPIO);
    /* Set the GPIO as a push/pull output */
    gpio_set_direction(LEFT_DOOR_GPIO, GPIO_MODE_OUTPUT);
    gpio_set_direction(RIGHT_DOOR_GPIO, GPIO_MODE_OUTPUT);
    /* Set these PINs high */
    gpio_set_level(LEFT_DOOR_GPIO, 1);
    gpio_set_level(RIGHT_DOOR_GPIO, 1);

    ...
}
Finally, inside our handling function is where we process the messages we receive to any of the channels we mentioned before:
static esp_err_t mqtt_event_handler(esp_mqtt_event_handle_t event)
{
    esp_mqtt_client_handle_t client = event->client;
    int msg_id;

    switch (event->event_id) {
        ...
        case MQTT_EVENT_DATA:
            ...
            // Get the topic name
            char *topic = malloc(event->topic_len);
            memcpy(topic, event->topic, event->topic_len);
            topic[event->topic_len] = '\0';

            // Get the data
            char *data = malloc(event->data_len);
            memcpy(data, event->data, event->data_len);
            data[event->data_len] = '\0';

            if (strcmp(topic, LEFT_DOOR_TOPIC) == 0) {
                if (strcmp(data, "PUSH") == 0) {
                    gpio_set_level(LEFT_DOOR_GPIO, 0);
                    vTaskDelay(500 / portTICK_PERIOD_MS);
                    gpio_set_level(LEFT_DOOR_GPIO, 1);
                }

            } else if (strcmp(topic, RIGHT_DOOR_TOPIC) == 0) {
                if (strcmp(data, "PUSH") == 0) {
                    gpio_set_level(RIGHT_DOOR_GPIO, 0);
                    vTaskDelay(500 / portTICK_PERIOD_MS);
                    gpio_set_level(RIGHT_DOOR_GPIO, 1);
                }
            }
            ...
    }
    return ESP_OK;
}
The next step will be to test our setup. For that you can use any MQTT client, but first we need to upload our code to chip. Make sure your device is connected to your computer and run:
make flash
or if you want to see the log messages and what’s going on:
make monitor
or you can just do both in one shot:
make flash monitor
I’m using the mosquitto_pub application. Which I run the following commands:
mosquitto_pub -h iot.eclipse.org -t "/garage/door/right" -m "PUSH"

mosquitto_pub -h iot.eclipse.org -t "/garage/door/left" -m "PUSH"
The first command sends the message PUSH to the right door, and second one to the left door.
Here is short video showing these commands running:
In the next parts of this series, we’ll add some sensors, install the device in the garage and create a mobile application to interact with it. Stay tuned!
Size matters, but it is not all about the size
- September 9, 2018
- tuxotron

If you are familiar with Docker, and have been using Docker for some time, you will probably already know or have read, that it is important and a good practice to reduce as much as you can the size of your images. Crafting your Dockerfile carefully to reduce the number of layers, using a minimalist base image to create small images, etc.
Sure, this is very important in order to save some space on disk. It will also reduce the network traffic, since at some point you will upload your image to some registry, to later download to a particular node or nodes. And sure, the startup time of your container could drastically be affected by bigger images, not because it really takes more time to spin up the container of a bigger image, but because if the image is not cached locally, it will need to be downloaded.
So, size matters, but after all, disk memory and network traffic, nowadays are cheap and probably not a big deal or concern. Now, reducing the size of your images, also means reducing content and therefore, security risks. It makes no sense to have an image full of libraries, applications, etc that your applications don’t need. The more “stuff” you have in your image, the more often you will need to update your images to apply security patches and updates, and consequently, redeploy the containers that use them. This also reduces the noise caused by security scanners, which in the majority of the cases, unless your application has been flagged with some CVE or something similar, these security vulnerabilities are not related to your application. Not that your application is not vulnerable though… but that’s a different story.
Having all this extra “stuff” in your image is also a great benefit for an attacker. If a bad actor is able to break into your application, remember is not about if you have been compromised, but when, ideally you have setup your environment to reduce the risks. Using regular Linux commands and applications, can provide many different ways to escape your current shell, escalate privileges, upload/download files, etc. Things like apt-get that we all use to install the dependencies in our image, can be abused, the command more, or something as “innocent” as whois can be abused to upload or download files. Take a look to a project called GTFOBins, it is full of crazy tricks you can do with regular Linux commands.
As much as possible, don’t focus to just reduce the size of your images, but also their content. Try remove as much as you don’t need to mitigate the security risks as well.
Google has a sub project under GoogleContainerTools called “Distroless” Docker Images.
“Distroless” images contain only your application and its runtime dependencies. They do not contain package managers, shells or any other programs you would expect to find in a standard Linux distribution.
These images are programming language oriented (Java, Python, NodeJs, etc), and as you can read, they only contain the dependencies your application needs to run. They don’t even contain a shell. Although for debugging purposes, each of the images has a :debug tag, which will add a shell to your image, that will allow you to peek inside your container to debug potential issues during the development phase. Go and read more about that project because is very interesting.
If you prefer, here is a presentation video about the Distroless project:
Books


Search
Recent
- Creating expired X.509 certificates
- Posts
- Docker image generator for infosec
- Extending kubectl
- How kubectl uses Kubernetes API
- Moving the blog images from Flickr to Digital Ocean Spaces
- Controlling your garage doors with an ESP32 - Part 3
- Controlling your garage doors with an ESP32 - Part 2
- Controlling your garage doors with an ESP32 - Part 1
- Size matters, but it is not all about the size